Decorating a Plain Paper Bag with Kirigami Rabbits

Kirigami giftwrap 16

This paper bag is as plain as it gets, no frills at all, and it costs only $2 for 3 from Daiso.

So what do you do with plain paper bags? Use Washi!

One word of caution in using Washi Tape, please don’t paste many different patterns together, like there is no end to the tape. Personally I think it’s nice to use 3-4 different designs, as long as the colours are complementary to one another.

When pasting Washi on stuff, think patterns, think lines, and shapes. Nice decorated MT tapes are wasted when they are pasted on stuff haphazardly. You might have a huge stash, but do try to restrain yourself when it comes to decorating stuff with Washi, as it might just end up looking like your 3 year old kid did the crafting.

What you will need for this project :

1. 1 Kraft Paper Bag

2. Wooden Clothes-peg

3. Washi Tape

4. Penknife

5. Scissors

Kirigami giftwrap 25

  • Paste Washi Tape on Kraft Paper Bag. I kept it simple, as will be adding on a Kirigami feature on the right of the bag to balance it out visually.

Kirigami giftwrap 26

  • More use for the Washi Tape! Paste tape on the wooden clothes peg, trim away the excess
  • Making the Kirigami Rabbits
Kirigami giftwrap 17

You will need :

1. Origami Paper – In a matching shade to the Washi Tape

2. Sharp Scissors

3. Pen-knife

4. Xacto Knife

5. Self-Healing Mat

6. Kirigami Bear (4-fold) and Rabbit (8-fold) patterns Rabbitkirigami numbered

1) Fold the 15cm x 15cm Origami Paper in Half

2) Fold it into quarters

3) Fold it into 1/8 – this is known as the Kirigami Rectangle 8-Fold

4) Make sure that the triple V’s of the folds are facing to the left side

  • Cutting out the Kirigami Rabbits

Rabbitkirigami1 numbered

1) Staple the pattern of the rabbit on the base of the Rectangle 8-Fold paper, making sure that the edges are lined up

2) Cut out the pattern, you will have to use the Xacto Knife for the fine corners of the pattern.

3) Open up the paper, you should see 3 pairs of rabbits holding hearts, and 2 rabbits holding on to halve heart shapes.

  • On plain drawing paper, draw a circle using a drawing compass.

Kirigami giftwrap 27

  • Paste the Kirigami Rabbit cut-out on the circled card, trim off the excess paper cut-out

Kirigami giftwrap 28

  • Clip the card on to the right side of the bag, with the wooden clothes-peg.
There you have it, a decorated Kraft Paper Bag with Washi and Kirigami Rabbits card. This design is versatile for a gift bag for a 1-month old baby present, or can be used to hold a gift for a lady.

Kirigami giftwrap 15

P.S. In case you are wondering if I am using Rabbits, as it is Easter this weekend. For sure,  you can use the Kirigami Rabbits design for your Easter bags. I used this bag to hold a gift for a friend, didn’t need any specific occasion.

This post was not planned to coincide with Easter this week, you can read what I think about ‘Rabbits and Eggs’ that are commonly used as celebrated visuals for Easter.

Share it:

Related posts:

Bow Origami and Bear Kirigami for Gift Wrapping

After the last experience I had with gift-wrapping during Christmas last year, I have since given up on patterned papers for gift wrapping.

I didn’t do such a bad job with it, but I felt the prints were kind of busy and it was not that worth spending money on since gift wrap paper was not exactly that cheap from Typo. The prints were lovely and festive, but they were ‘time-sensitive’, as I am not able to use the remaining Christmas gift-wrap paper until Christmas comes around this year.

Screen Shot 2015 03 11 at 3 22 34 pm

I like to work with cheap and easily accessible materials for crafting. And the best place for cheap but useful materials to be used in crafting? It’s Daiso, of course (this is not a sponsored post btw, just sharing my fondness for cheap craft materials from Daiso).

The thing with Daiso I realised, is that you need to have a rough idea of what you plan to craft and be very specific with the kind of materials that can be used for your project, if not, you will end up cluttering your home with lots of cheap but don’t-know-what-to-do-with-them materials.

As I am into Origami and Kirigami lately, I have been buying Origami Paper. And from my last trip to Daiso, I couldn’t resist getting 2 of the $2 Washi Tapes that were sold there.

Since we are into the topic of Washi Tape, let me show off my collection.

Screen Shot 2015 03 11 at 3 38 27 pm

Yup. It’s just 10 rolls of multicoloured washi and the two new rolls that I got from Daiso. You were expecting a whole stash, isn’t it? Well, I did say that I was a cheap crafter, I only buy what I know I will use. I have been using the multi-coloured tapes so much for my #InHisLoveMail snail mail packages, that I might have to get a replacement set quite soon.

I think Washi is one of the most ‘dangerous’ craft materials that are out there, especially the MT branded ones. It is easy to become a MT Washi Collector, but a little more challenging to be a frequent Washi user and knowing how to use them tastefully for crafting projects. Enough from me, griping about the dangers of Washi…

So without further ado, here’s sharing a gift wrapping idea combining Origami, Kirigami, Kraft Paper and Washi Tape.

Kirigami giftwrap 14

What you will need;

1. Origami Paper (3 sheets, colour of your choice)

2. Kraft Paper

3. Washi Tape

4. Scissors

5. Sticky Tape

6. Kirigami Bear Pattern (available together with the pattern in the next post)

*You don’t need a self-healing mat for this, as the Kirigami Bear Pattern can be easily cut out using a sharp pair of scissors


  • Making the Origami Bow

Origamibowwithnumber

1) Select to compliment colours for the ribbon, I chose grey and pink
2) Have the white sides of the origami paper facing one another
3) Glue the back of the origami sheets together
4) You will then get a single sheet of origami, front is coloured grey, and the back is pink.


The instructions to make the origami bow is found in a YouTube video here:

Kirigamibow1

5) I used a gold pen to draw dots on the origami bow to make it a gold polka-dotted bow, you can keep it plain if you prefer.

 

  • Making the Kirigami Bear

Kirigamibearnumbered

1) Fold the 15cm x 15cm Origami paper in half

2) Fold it into quarters – this is known as the Kirigami Rectangle 4-Fold

3) Make sure that the double v’s of the folds are facing the left side

4) Staple the bear pattern at the barn of the 4-fold rectangle, making sure that the edges are lined up with one other.

5) Cut out the pattern, and unfold the paper. You should see 2 pairs of bears joined together.

Kirigami giftwrap 5

  • Wrap the box or present with Kraft Paper
  • Paste the Washi Tape vertically across, indented to the left of the box
  • Intersect the Washi Tape horizontally across, indented to the 3/4 top part of the box

Kirigami giftwrap 12

  • Paste the Origami Bow on the intersection where the Washi Tape crosses one another
  • And paste the Kirigami Bear diagonally below


And there you have it, a gift wrapping design with a Bow Origami and Bear Kirigami! This gift wrapping design can be for a guy (my dad’s birthday is coming up in April) as you can skip the drawing the polka dots on bow, and the bears make it less feminine. But it is adaptable for a gift for a child or a lady too.

Kirigami giftwrap 13

**Note : The Kirigami Bear pattern will be available together with the pattern for the next post

Share it:

Related posts:

For the Love of Paper Craft

I recently discovered my love for Paper Craft, after embarking on #InHisLoveMAIL initiative.

Paper Craft is one of the most accessible forms of crafting, and most who think of Paper Crafting, think of Scrap-booking. Scrapbooking is a great way where stories can be preserve behind the photos and one can express themselves creatively with beautiful embellishments, memorabilia on patterned papers.

Screen Shot 2015 03 05 at 8 03 30 pmSource

When I found out I was pregnant with K in 2006, it was the first time I got myself some Scrap Book elements and was all ready to journal my journey having my first (and only) child through photos in a Scrap Book.

But I never got around doing it.

I realised that I have never been a Scrap-Book Crafter, and will never be. Although the embellishments sold in Scrap Book stores were so tempting, I curbed the temptation and saved quite a bit of money. Have you seen how expensive Scrap Book Materials are?

8 years down the road, I am now exploring Paper Crafting, but techniques other than Scrap Booking :)


Great for First Time Crafters

Paper is accessible, forgiving and cheap. People who want to start on crafting should start with paper, as it is less daunting compared to the other craft techniques.

There is so much you can do with Paper Crafts. All is take is some coloured or plain paper, thick or thin, and you can create something new by folding, cutting, colouring, sticking or layering.

Paper Craft can be used in a variety of ways;

  • Handmade cards,

Screen Shot 2015 03 05 at 8 15 29 pmSource

  • Personalise snail mail,

Screen Shot 2015 03 05 at 8 36 03 pmSource

  • Decorate a shelf with garlands,

Screen Shot 2015 03 05 at 8 40 44 pmSource 

  • Decorate the wall at home

Screen Shot 2015 03 06 at 1 06 45 pm Source

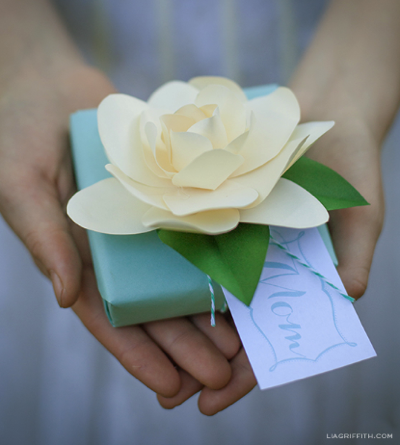
  • Personalise gift wrapping with gift toppers
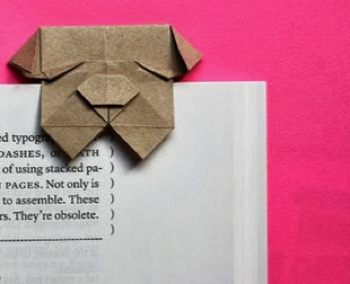
  • Make your own stationery (bookmarks or personalise letter writing paper)
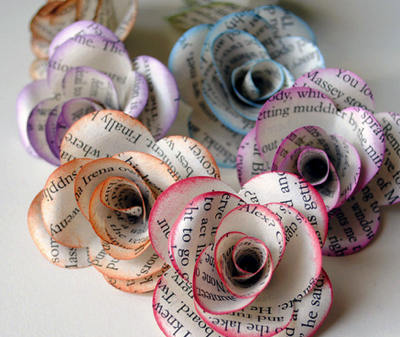
  • Paper flowers to decorate the table
  • DIY Paper Decorations

Screen Shot 2015 03 06 at 2 28 25 pmSource


I will be starting on a new series, sharing my love for Paper Craft with ideas and tutorials, so do look out for the posts in the weeks ahead.

Share it:

Related posts: