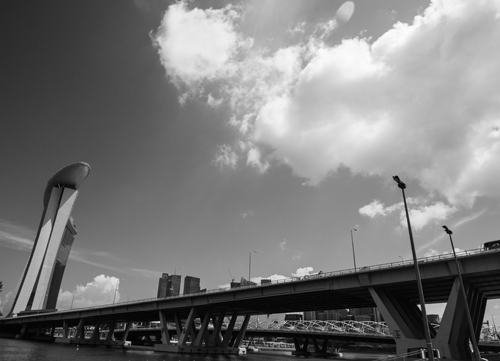
With the onset of Photo Heart Fridays meme, one of the recurring new themes for this blog is to break out of my comfort zone in my photographs.
I always been quite comfortable with capturing portrait candid shots of mainly of K and family and have never been a fan of urban landscapes.

Until this weekend.
We were at Marina vicinity on Sunday and I took this opportunity being out and about to step out my comfort zone to explore a different subject area and think a little differently about what I take.
This is what I learnt from my photo walk :
1. Treat your camera like a film camera
How many memory cards are enough when you are out in a new place with your kids? One and only one.
It gets really easy to shoot sloppily when you have digital cameras. I used to be snap-happy and take more photos than I need, then take a long time to go through the photos after I upload them on my computer.
Now, I imagine that I am holding a film camera and every shot that I take counts. It also helps me to think a little more about each photo before I capture it. I look through the lens, press the camera trigger, hold my breath for a couple of seconds and cross my fingers that I get a good shot.
A 8GB memory card is more than enough for any photo walk as the magic number 3 works for me. I only take 3 shots of the same subject in different angles and I get really merciless to delete the photos when I preview them on the live screen.
2. Foreground interest
This method gives the photo a sense of distance and perspective. The photo will look a little more three-dimensional, even thought they are only 2D.

One of the ways to maximize the foreground is to go close and low to the ground to take the photo. I was able to capture alot more in these photos, as I was using my wide angle lens and was almost lying face down on the ground to take the next photo.
For compact cameras, go with the widest angle (which means no zoom!). Then position your camera closest to the ground, capture the scene in your LCD Live View and snap!
This focus on the foreground helps to lead the photo from the viewer’s eye, which will naturally travel down from the foreground to the background of the scene, like in this photo,

The yellow and white lines led you to the palm trees, then blue skies and the line of clouds in the background, isn’t it?
This then brings me to the 3rd point.
3. Look to the sky
Clear blue skies and white cottony-looking clouds do help to improve photos, especially when the buildings or structures landscape in the background in your landscape don’t look interesting.

You can further enhance the shapes in a dull photograph by using this option in Photoscape (it’s a free software to download if you are on Windows) known as ‘Cross Process’ to highlight the contrast and shadows. Instagram is not the only app available with great filters 😉
Makes a difference doesn’t it?

Or if you are in a somber mood and want your photos to portray your moody artistic side, going mono with black and white always works.

4. Spot the details
I like going close to stuff, it doesn’t have to be macro close (that’s another project altogether). I snapped this photo of the water lily in a pond right outside the Art Science Museum at MBS, got close enough to focus only on the flowers and the lily pads and left out the people sitting around the pond from the photo.

These days, you don’t need a DSLR to capture photos like that. If you are planning to get a new point and shoot camera soon, consider getting the Canon Powershot series, Olympus, Fuji or Panasonic Lumix cameras which have manual and macro functions. See this list of top 10 compact cameras with manual controls).
5. Catch the Golden Hour
There are two special times in the day known as the ‘Golden Hour’. It is the first hour before sunrise and sunset.
The golden hour before sunset in Singapore starts at 6.30pm on a typical day with fine weather. This is the time when the reds or the golds from the setting sun sometimes get reflected against the white of the clouds. No two evenings are the same.

This other photo was taken 10 minutes before twilight. Seeing the last sliver of the light from setting sun in the horizon, creating mere silhouettes of the buildings, made hanging out at the maddening crowds at MBS, till the ‘Golden Hour’ alot more worthwhile.
 (All photos taken by a Canon 550D)
I hope by sharing this learning experience with my first photo project of capturing urban landscapes, it will motivate you to pick up your cameras to capture visually intriguing scenes of your urban landscapes.
“The camera is an instrument that teaches people how to see without a camera.” – Dorothea Lange
P.S – I tend to get very experimental and intuitive in this journey of improving my photography skills. One of the best way I learn is by browsing through photography sites and photography books, and the most crucial part of this self-learning journey is by taking regular photo-walks and giving myself plenty of trial and error experiences.
What do you find most challenging when capturing photographs of urban landscapes?


LOVE!!! Thanks for the tips! And I super enjoy taking macros too.
Adeline´s last blog post ..We went to watch Megan’s first dance in school!
I LOVE the one with the lines on the road! Gorgeous!!
Adora´s last blog post ..Wordless Wednesday: Cooking Up A Storm